Complete Guide to Circuit Card Assembly: From Prototype to Production
Get Your PCB Quote!

Circuit Card Assembly is where modern electronics come to life. This is how a flat and lifeless circuit can be transformed into a powerful engine that powers everything from smartphones to industrial equipment. Understanding the steps is important whether you are a hobbyist who wants to build your first working circuit board or a manufacturer trying to make your product ready for big-league competition.
This post is about guiding you of mass production of prototype from top to end.
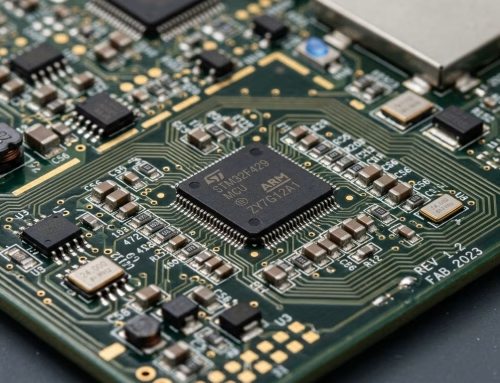
CCA’s core is the attachment of tiny electronic components onto a printed circuit board(PCB). Imagine resistors and capacitors — the parts that make your gadget “smart”.
Step 1: Prototype’s Initial Stage
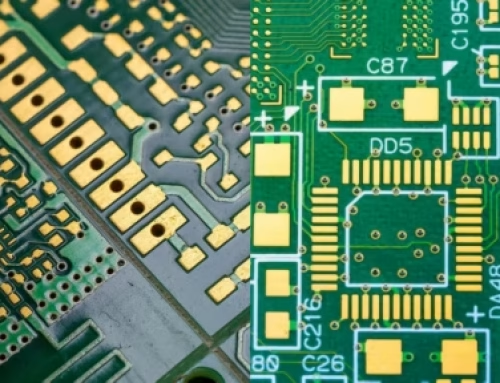
The initial stage of manufacturing PCB is a prototype. Starting the design process involves an opportunity to determine what works and what may require additional development. The first step should be creating a schematic circuit illustration; programs like KiCad or Altium developer may help grease this step in mapping out ideas.
Once you have your schematic in hand, the coming step in designing the PCB should be creating its layout. This includes opting where factors will go on the board as well as how they connect together on it..
Step 2: Choosing the right components
Step three requires additional consideration: choosing components. It isn’t enough just to purchase inexpensive parts – instead you should check datasheets to ensure their specifications match with those in your design. This includes things like voltage, tolerances, surface-mount or through-hole types.
Giving a proper attention and constant focus is the first step of the production Bulk purchases can save money, but they also require that you keep an eye on the stock levels and lead times of suppliers to avoid delays. Be sure that your supplier is reliable. Delays here can cause everything to slow down.
Step 3: The Assembly Process
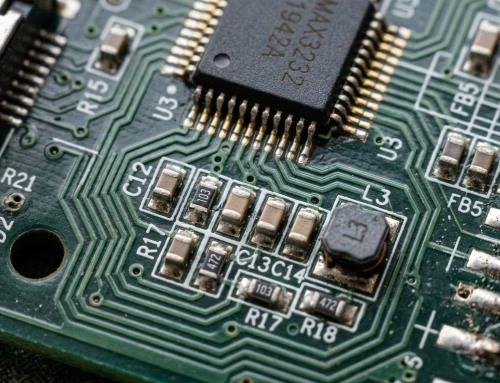
Hand-soldering works best when you are still in prototyping. It is quite effective and short-time process. Surface-mount components — the tiny parts that are directly mounted on the board — require a little more care. Tweezers and a solid hold might be an effective pair with magnifying lenses.
Automated assembly is better for higher volume. Automated machines, such as pick-andplace systems, are extremely precise in positioning components. Reflow ovens ensure that everything is soldered evenly and perfectly. The equipment is expensive, so smaller companies often hire manufacturers to do it. It’s faster and cleaner than doing it manually.
Step 4: Don’t skip the testing
It’s now time to test your prototype. We really mean test.
Begin with a visual inspection: Look for any solder joints that are not quite right or any parts that haven’t landed where they should. Grab a multimeter to check voltages, and continuity. It’s great if it works. Now, put it through some tests. It’s important to check that the board functions as it should when it is put through its paces.
When your circuit is more complex, tools such as oscilloscopes and logic analyzers are a great way to spot problems or tweak the behavior of everything. What if it doesn’t work at all? Redraw your design or reflow the component and try again.
Step 5: Getting Ready for Production
Your prototype is working — great! That’s the approach to level-up your project.
Check your Gerber files for any changes. Now, let’s describe more
Decide whether you will build your own Printed Circuit Board Assembly or contract a manufacturer. In-house is a good option if you have the right team and tools, and your volume is low. Outsourcing to a CM for large-scale projects is the best option. Follow the Rules and Regulation. documentations should be cleared and finalized
Step 6: Bring in the big machines
Automation is the key to full-scale production. The step might be quite easy, you just have to start with solder paste by using the PCB components.
Wave soldering machines or insertion machines can be used to handle through-hole parts, depending on the type of part you are working with. AOI stands for automated optical inspection that scan the defected components of the board. Analysing the issue might release your tension from the major issue.
Step 7: Quality checks that actually matter
Quality control is essential when you are building large quantities of units. It may not seem important until you have to deal with a recall or angry clients.
In-process checks, such as X-ray machines, can be used to find hidden problems and thoroughly test the finished boards. Stick to industry standards such as IPC-A-611, especially if your boards are for industries that require stricter standards, like aerospace and healthcare.
Step 8: When things go sideways
Even when you plan well, things can still happen. Learning curves include cold solder joints or misaligned components. It’s not always your fault. Sometimes, it is a problem with the design. Most of time, it make an issue with other components, functions, or machineries.
Therefore, a perfect technique is important to deal with these challenging tasks. Keep records, check visually and electrically and don’t hesitate to stop production to fix an issue that keeps recurring.
Step 9: Packaging and Shipping
The last step is to get your boards safely outside the door. This means using anti-static packaging, such as ESD bags or inserts made of foam, and clear labeling. When shipping to companies, work with their logistics team so that your product will fit into their system.
When selling directly to the consumer, simple setup instructions or instructions can make all the difference.
Final Thoughts
It’s not just about following steps. Building circuit cards or PCB Board Assembly requires a lot of attention to detail. Understanding each phase of CCA will give you an advantage, whether you are putting a side-project into production or preparing for mass production.

Get Your PCB Quote!