Master PCBA Desoldering: Techniques & Tools Guide
PCBA desoldering is vital for electronics repair, modification and salvage, and the basic tools include soldering iron, desoldering pump and desoldering wick.
Get Your PCB Quote!
Table of Contents

In the intricate world of electronics, soldering is often hailed as a fundamental skill. However, its counterpart, desoldering, is equally—if not more—critical for anyone working with assembled Printed Circuit Boards (PCBs). PCBA desoldering is the process of removing solder to detach electronic components from a circuit board. Whether you’re a seasoned professional technician, an electronics hobbyist, or an aspiring engineer, mastering desoldering techniques is essential for repair, modification, and prototyping tasks. Poor desoldering can lead to irreparable damage to components or the PCB itself, turning a simple fix into a costly mistake.
This comprehensive guide will walk you through the essential tools, proven techniques for both through-hole and surface mount components, and crucial safety tips to help you become proficient in the art of desoldering. Get ready to gain the confidence to tackle any PCBA rework challenge without damaging your sensitive electronic components or the board.
1. Why PCBA Desoldering Matters: Repair, Rework, & Salvage
PCBA desoldering isn’t just about reversing the soldering process; it’s a vital skill with numerous applications in electronics:
- Component Replacement:If a component fails, desoldering allows for its safe removal and replacement with a new one, extending the life of the electronic device.
- Circuit Modification and Upgrades:For hobbyists and developers, desoldering enables the swapping of components to upgrade functionality, add new features, or correct design flaws in existing circuits.
- Salvaging Parts:Often, valuable or hard-to-find components can be salvaged from old or broken circuit boards through careful desoldering, promoting reuse and reducing waste.
- Troubleshooting and Diagnostics:Removing suspected faulty components can help isolate issues in a circuit, making troubleshooting more efficient.
- Error Correction:Even experienced assemblers make mistakes. PCBA desoldering provides a way to correct wrongly placed components without scrapping the entire board.
Understanding the “why” behind desoldering underscores its importance in the lifecycle of any electronic device, from manufacturing to repair and recycling.
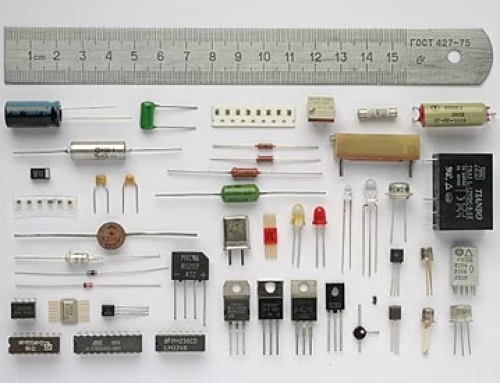
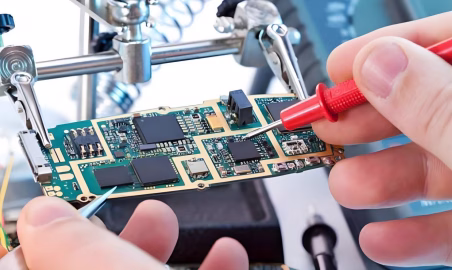
2. Essential Tools for Effective PCBA Desoldering
Just as with soldering, having the right tools makes all the difference in desoldering. Investing in quality equipment will ensure safer, cleaner, and more efficient component removal.
2.1 Soldering Iron
While primarily a soldering tool, a soldering iron is indispensable for desoldering as it provides the heat necessary to melt existing solder. Look for an iron with adjustable temperature control, as different solders and components require varying heat levels. A good iron will also have various tip sizes; chisel or conical tips are generally versatile for desoldering. Maintaining a clean, properly tinned tip is crucial for efficient heat transfer.
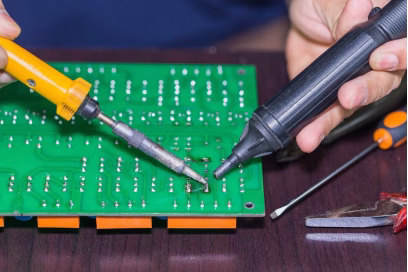
2.2 Desoldering Pump (Solder Sucker)
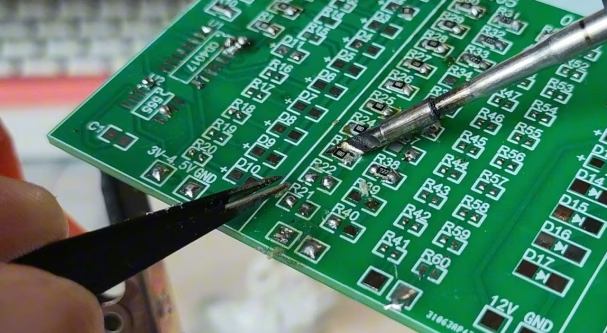
The desoldering pump, often called a “solder sucker,” is a mechanical vacuum device used to physically suck up molten solder. It consists of a spring-loaded piston that creates a vacuum when released. The nozzle is placed over the molten solder joint, and the button is pressed to quickly remove the solder. This tool is highly effective for through-hole components and for clearing excess solder from pads.
2.3 Desoldering Wick (Solder Braid)

Desoldering wick is a finely braided copper wire coated with flux. When placed over a molten solder joint and heated with a soldering iron, the wick absorbs the molten solder through capillary action. It’s excellent for removing thin layers of solder, cleaning pads, and can be more precise for delicate work than a pump. The used portion of the wick should be cut off after each use to expose fresh, flux-coated braid.
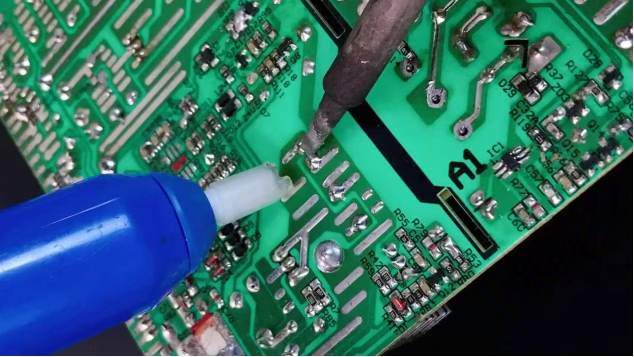
2.4 Flux
Flux is a chemical agent that cleans the metal surfaces by removing oxidation and improving solder flow. When PCBA desoldering, adding a small amount of fresh flux to the joint can significantly help the old solder melt more uniformly and be more easily absorbed by a wick or removed by a pump.
2.5 Tweezers and Pliers
Once the solder is removed, components may still be held by residual solder or friction. Tweezers (especially fine-tipped ones) and small pliers are essential for gently grasping and removing components without damaging them or the PCB.
2.6 Hot Air Rework Station (Heat Gun)
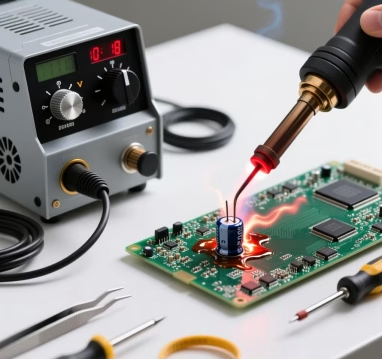
For Surface Mount Devices (SMDs), a hot air rework station is often preferred. It delivers a controlled stream of hot air to melt solder simultaneously on multiple pins or an entire component. This prevents stressing individual pads or pins and makes removing multi-pin SMDs much easier. Temperature and airflow control are key features for these stations.
2.7 Safety Gear
Never overlook safety! Essential safety gear includes:
- Safety Glasses:To protect your eyes from flying debris or molten solder splatters.
- Fume Extractor:Solder fumes contain harmful lead (if using leaded solder) and flux activators. A fume extractor filters these fumes, protecting your respiratory health.
- Heat-resistant Mat:To protect your workbench from heat damage.
3. Desoldering Through-Hole Components
Desoldering through-hole components is typically the most common task for beginners. Here’s how to do it effectively using a soldering iron with either a desoldering pump or wick.
3.1 Using a Soldering Iron and Desoldering Pump
1) Preparation: Ensure your soldering iron is heated to the appropriate temperature (typically 350-400°C for leaded solder, higher for lead-free). Clean and tin the iron tip. Have your desoldering pump primed and ready.
2) Apply Heat: Place the hot soldering iron tip onto the solder joint, making contact with both the component lead and the PCB pad. Allow the solder to melt completely, usually within 2-5 seconds. You might add a tiny bit of fresh solder or flux to help the old solder flow better.
3) Vacuum the Solder: Immediately remove the soldering iron and quickly place the nozzle of the desoldering pump directly over the molten solder joint. Press the release button to suck up the molten solder.
4) Inspect and Repeat: Check the joint. If solder remains, repeat steps 2 and 3 until the component lead is free and visible through the hole. For multi-pin components , work on one pin at a time, allowing the PCB to cool slightly between successive attempts to prevent overheating.
5) Component Removal: Once all pins are free, gently pull the component out with tweezers or pliers. Do not force it, as this can damage the component or the PCB traces.
3.2 Using a Soldering Iron and Desoldering Wick
1) Preparation: Heat your soldering iron and clean its tip. Cut a fresh piece of desoldering wick if needed.
2) Apply Wick and Heat: Place the end of the desoldering wick over the solder joint you want to clean. Then, place the hot soldering iron tip directly onto the wick, pressing it against the solder joint.
3) Absorb Solder: As the iron heats the wick, the flux within the wick activates, and the molten solder will be drawn into the braid through capillary action. You’ll see the solder wick absorb the solder.
4) Remove and Inspect: Once the solder is absorbed, remove the soldering iron and the wick simultaneously. Cut off the used, solder-filled portion of the wick. Inspect the joint; if necessary, repeat with a fresh piece of wick until the component lead is free.
5) Component Removal: Carefully remove the component. This method is particularly effective for cleaning pads and removing thin layers of residual solder after using a pump.
Using a combination of both a pump and a wick often yields the best results, especially when dealing with stubborn solder joints.
4. Desoldering Surface Mount Devices (SMDs)
SMDs are smaller and have leads that sit on the surface of the PCB, making them more challenging to desolder than through-hole components. Precision and control are paramount to avoid damaging tiny pads or adjacent components.
4.1 Using a Soldering Iron for SMDs
For 2-pin SM Ds (like resistors, capacitors) or small ICs with a few pins:
1) Add Fresh Solder/Flux: Apply a small amount of fresh solder (which melts at a lower temperature) or flux to the pins you’re desoldering. This helps the existing solder flow better.
2) Melt Solder on Both Sides (2-pin): For 2-pin components, heat one end until the solder melts, then quickly switch to the other end. While both ends are molten, gently nudge the component off the pads with tweezers.
3) Drag Desoldering (Multi-pin): For ICs, if you don’t have a hot air station, you can try “drag desoldering.” Apply flux along one row of pins. Melt a pool of solder on a chisel tip, then drag it across all pins, lifting them from the pads. Repeat for the other side. This requires practice.
4) Component Removal: Once the component is free, clean the pads using a desoldering wick to prepare for a new component.
4.2 Using a Hot Air Rework Station (Heat Gun)
This is the preferred method for most multi-pin SMDs, especially ICs with many leads:
1) Preparation: Set the hot air station to the appropriate temperature (consult component datasheet or start with 300-350°C) and airflow. Apply flux around the component pins.
2) Apply Heat: Hold the hot air nozzle a few millimeters above the component. Move the nozzle in a circular motion to ensure even heating across all pins and the component body.
3) Monitor Solder: Watch for the solder to become molten and shiny around all pins. This usually takes 10-30 seconds, depending on component size and board thickness.
4) Remove Component: Once the solder is liquid, gently lift the component with tweezers. Do not force it; if it doesn’t lift easily, apply more heat evenly.
5) Clean Pads: After removal, allow the board to cool. Then, use a soldering iron and desoldering wick to clean the pads of any residual solder, ensuring a flat, clean surface for the new component.
Using a hot air station significantly reduces the risk of damaging delicate SMD pads, which are particularly susceptible to lifting if excessive mechanical force is applied.
5. Advanced Tips for Successful PCBA Desoldering
- Add Fresh Solder:Sometimes, adding a tiny blob of fresh, leaded solder (even to lead-free joints) can help old, oxidized solder melt and flow better, making it easier to remove.
- Pre-Heating:For larger boards or multi-layer PCBs, pre-heating the entire board on a hot plate or with a lower temperature hot air gun can make desoldering easier by reducing thermal shock and improving heat transfer.
- Cleanliness:A clean soldering iron tip transfers heat much more efficiently. Regularly clean your tip with a brass sponge or damp cellulose sponge. Keep your workbench tidy.
- Patience:PCBA desoldering requires patience. Don’t rush or try to force components. If solder isn’t melting, re-evaluate your temperature settings or apply more flux.
- Isolate Adjacent Components:When using hot air, cover nearby sensitive components with Kapton tape or aluminum foil to protect them from unintended heat exposure.
- Magnification:For SMDs, a magnifying lamp or microscope can greatly aid in precise placement of tools and inspection of joints.

6. Common PCBA Desoldering Mistakes to Avoid
Even with the right tools, missteps can lead to damage. Be aware of these common pitfalls:
- Overheating:Applying too much heat for too long can lift PCB traces, damage pads, or destroy the component itself. Use appropriate temperatures and work quickly.
- Forcing Components:Attempting to pull a component out before all its pins are fully desoldered is a surefire way to rip pads or traces. Ensure solder is completely molten and removed.
- Dirty Tools:A dirty soldering iron tip will not transfer heat efficiently, leading to prolonged heating times and potential damage. A clogged desoldering pump won’t create effective suction.
- Neglecting Flux:Not using flux with a desoldering wick or when trying to remove stubborn solder makes the job much harder and less effective.
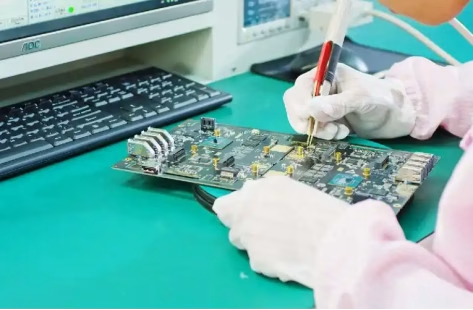
- Improper Grounding:Always work on an ESD-safe mat with proper grounding, especially when handling sensitive components, to prevent electrostatic discharge damage.
7. Safety First: Protecting Yourself and Your PCBA
Safety is paramount when working with electronics. Here are key considerations:
- Ventilation:Ensure adequate ventilation or use a fume extractor to avoid inhaling solder fumes, which contain harmful particulates and chemicals.
- Eye Protection:Always wear safety glasses to protect against molten solder splashes, flying component leads, or accidental tool slips.
- Burn Prevention:Soldering irons and hot air stations operate at high temperatures. Use stands, be mindful of where you place hot tools, and avoid touching hot surfaces.
- Electrical Safety:Ensure your equipment is properly grounded and in good working condition. Never work on live circuits.
- ESD Protection:Use an anti-static mat and wrist strap when handling sensitive electronic components to prevent electrostatic discharge, which can damage integrated circuits.
8. PCBA Desoldering FAQs
Yes, but lead-free solder generally requires higher temperatures (around 375-400°C) compared to leaded solder. You might need a more powerful soldering iron or ensure your current iron can reach and maintain these higher temperatures. Using fresh flux is also highly recommended.
This could be due to several reasons: the solder isn’t fully molten, the pump nozzle isn’t sealing tightly against the joint, the pump is clogged, or there’s insufficient heat transfer from your iron. Try adding fresh flux, ensuring a good seal, and cleaning your pump regularly. Make sure your iron tip is clean and tinned for optimal heat transfer.
The most critical factors are heat management and avoiding mechanical force. Don’t apply heat for too long; work quickly. Ensure the solder is fully molten before attempting to remove the component or apply vacuum. Never pull or pry a component that is still soldered down. For multi-pin components, ensure all pins are free before attempting removal.
9. Summary
PCBA desoldering is an indispensable skill for anyone involved in electronics, offering the ability to repair, modify, and salvage components from PCBs. This guide has illuminated the essential tools—from the versatile soldering iron and desoldering pump to the precise desoldering wick and hot air rework station—and detailed the specific techniques required for successfully removing both through-hole and surface mount components. We’ve also emphasized the critical importance of safety, offering practical tips to protect both yourself and your valuable circuit boards. By mastering these techniques and adhering to best practices, you can approach any PCBA rework task with confidence and precision, ensuring the longevity and functionality of your electronic devices.
Key Takeaways
- PCBA desoldering is as vital as soldering for electronics repair, modification, and component salvage.
- Essential tools include a temperature-controlled soldering iron, desoldering pump, desoldering wick, flux, and for SMDs, a hot air rework station.
- For through-hole components, heat the joint and quickly use a desoldering pump or wick to remove solder.
- SMD desoldering often benefits from a hot air station, but a soldering iron with proper technique can work for smaller components.
- Always use flux to improve solder flow and ensure a clean desoldering process.
- Prioritize safety: wear eye protection, use a fume extractor, and work on an ESD-safe surface.
- Avoid common mistakes like overheating, forcing components, and working with dirty tools to prevent PCB damage.
Table of Contents

Get Your PCB Quote!